Rave Reviews on this one....

by 👩‍🍳 Cooking With a Southern Vibe in Music City USA 👩‍🍳, March 10, 2007

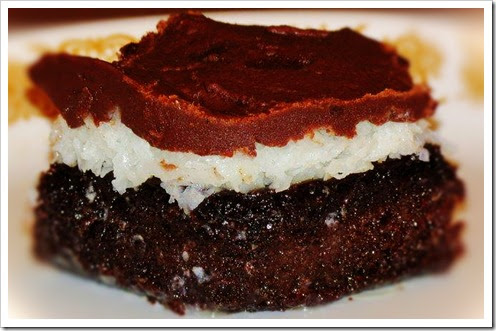
Double Chocolate Layer Cake by Ina Garten - The Barefoot Contessa

Ina’s description of it being the “most fabulous chocolate cake that I’ve ever made” had my interest peaked as well. The unique ingredient was coffee…how intrigued I was!

This cake is everything it promises to be… a unique twist on a standard rich and delicious chocolate cake. The coffee in the batter and in the frosting add just enough twist to the flavor of the cake that you will want to be coming back for more.

Ingredients

CAKE

  • 1 3/4 cups all-purpose flour, plus more for dusting
  • 2 cups sugar
  • 3/4 cup unsweetened cocoa powder
  • 2 teaspoons baking soda
  • 1 teaspoon baking powder
  • 1 teaspoon kosher salt
  • 1 cup buttermilk
  • 1/2 cup vegetable oil
  • 2 large eggs
  • 1 teaspoon pure vanilla extract
  • 1 cup freshly brewed hot coffee

FROSTING

  • 6 ounces semisweet chocolate, coarsely chopped
  • 2 sticks (1/2 pound) unsalted butter, at room temperature
  • 1 large egg yolk
  • 1 teaspoon pure vanilla extract
  • 1 cup plus 1 tablespoon confectioners’ sugar, sifted
  • 1 tablespoon instant coffee granules

Directions

  1. MAKE THE CAKE: Preheat the oven to 350°. Butter two 8-inch round cake pans and line them with parchment paper; butter the paper. Dust the pans with flour, tapping out any excess.
  2. In the bowl of an electric mixer fitted with a paddle, mix the flour with the sugar, cocoa powder, baking soda, baking powder and salt at low speed. In a medium bowl, whisk the buttermilk with the oil, eggs and vanilla. Slowly beat the buttermilk mixture into the dry ingredients until just incorporated, then slowly beat in the hot coffee until fully incorporated.
  3. Pour the batter into the prepared pans. Bake for 35 minutes, or until a toothpick inserted in the center of each cake comes out clean. Let the cakes cool in the pans for 30 minutes, then invert the cakes onto a rack to cool completely. Peel off the parchment paper.
  4. MAKE THE FROSTING: In a microwave-safe bowl, heat the chocolate at high power in 30-second intervals, stirring, until most of the chocolate is melted. Stir until completely melted, then set aside to cool to room temperature.
  5. In the bowl of an electric mixer fitted with a paddle, beat the butter at medium speed until pale and fluffy. Add the egg yolk and vanilla and beat for 1 minute, scraping down the side of the bowl. At low speed, slowly beat in the confectioners’ sugar, about 1 minute. In a small bowl, dissolve the instant coffee in 2 teaspoons of hot water. Slowly beat the coffee and the cooled chocolate into the butter mixture until just combined.
  6. Set a cake layer on a plate with the flat side facing up. Evenly spread one-third of the frosting over the cake to the edge. Top with the second cake layer, rounded side up. Spread the remaining frosting over the top and side of the cake. Refrigerate for at least 1 hour before slicing.

MAKE AHEAD The frosted cake can be refrigerated for 2 days. Let stand for 1 hour before serving.

Food and Wine Magazine's Malt Ball Cake

by 👩‍🍳 Cooking With a Southern Vibe in Music City USA 👩‍🍳, March 10, 2007


Cake
2 1/4 cups cake flour
3/4 cup all-purpose flour
1 cup instant malted milk powder
1 tablespoon baking powder
1/4 teaspoon baking soda
3/4 teaspoon salt
1/4 teaspoon grated nutmeg
1/2 cup unsalted butter, room temperature
1/2 cup vegetable shortening, room temperature
2 cups sugar
1 tablespoon pure vanilla extract
2 cups ice cold water
4 large egg whites, room temperature
Frosting and Garnish
10 ounces quality bittersweet chocolate, finely chopped
10 ounces quality milk chocolate, finely chopped
1 3/4 cups heavy cream
3 tablespoons light corn syrup
2 cups unsalted butter, cut into 1 inch chunks, softened

malted milk balls, for garnish

1. CAKE: Preheat the oven to 325. Butter and flour three 8 inch cake pans and line the bottoms with parchment paper. In a large bowl, whisk the flours with the malt powder, baking powder, baking soda, salt and nutmeg.
2. In the bowl of a standing electric mixer fitted with a paddle, beat the butter with the shortening until creamy. Add the sugar and vanilla and beat at medium speed until fluffy, about 3 minutes. Beat in the dry ingredients in 3 batches at low speed, alternating with the ice water, occasionally scraping down the side of the bowl.
3. In a clean bowl, beat the egg whites at medium high speed until soft peaks form. Fold the egg whites into the batter. Divide the batter between the pans, spreading it evenly and bake the cakes for 40-45 minutes until a toothpick inserted into the center comes out clean. Let the cakes cool in the pans for 20 minutes, then invert them onto a rack and let cool completely. Peel off the parchment.
4. FROSTING: Place the chocolate in a large bowl. In a small saucepan, bring the cream to a boil, then remove from the heat. Add the corn syrup; immediately pour the mixture over the chocolate. Let stand for 2-3 minutes until the chocolate has melted, then whisk until smooth. Let cool to room temperature.
5. Transfer the mixture to the bowl of a standing electric mixer fitted with a wire whisk. Gradually beat in the butter at medium speed, a few chunks at a time and beat until thoroughly incorporated between additions. The frosting should be smooth and silky. Refrigerate the frosting just until it is thick enough to hold its shape, 10-15 minutes.
6. Place one cake layer on a serving platter and spread 1 1/4 cups of the frosting over the top in an even layer. Repeat to form 2 more layers. Spread a thin layer of frosting over the side of the cake and refrigerate briefly until firm. Frost the side with the remaining frosting. Garnish the cake with malted milk balls and refrigerate briefly to firm up the frosting before serving.
7. The cake and be refrigerated in an airtight container for up to 4 days. Bring to room temperature to serve

I knew this, did you?

by 👩‍🍳 Cooking With a Southern Vibe in Music City USA 👩‍🍳, March 03, 2007
When you go to buy bread in the grocery store, have you ever wondered
which is the freshest, so you "squeeze" for freshness or softness? Did
you know that bread is delivered fresh to the stores five days a week?
Monday, Tuesday, Thursday, Friday and Saturday. Each day has a different
color twist tie. They are: Monday = Blue, Tuesday = Green, Thursday =
Red
Friday = White and Saturday = Yellow. So if today was Thursday, you would
want red twist tie; not white which is Fridays (almost a week old)! The
colors go alphabetically by color Blue- Green - Red - White - Yellow,
Monday through Saturday. Very easy to remember. I thought this was
interesting. I looked in the grocery store and the bread wrappers DO have
different twist ties, and even the ones with the plastic clips have
different colors. You learn something new everyday! Enjoy fresh bread
when you buy bread with the right color on the day you are shopping.

Black Bean Salsa

by 👩‍🍳 Cooking With a Southern Vibe in Music City USA 👩‍🍳, February 21, 2007

INGREDIENTS

  • 3 (15 ounce) cans black beans, drained and rinsed
  • 1 (11 ounce) can Mexican-style corn, drained
  • 2 (10 ounce) cans Rotel diced tomatoes with green chile peppers, drained
  • 2 tomatoes, diced
  • 2 bunches green onions, chopped
  • minced garlic
  • juice of 1 lime squeezed over salsa
  • salt and pepper to taste
  • cilantro leaves, for garnish

DIRECTIONS

  1. In a large bowl, mix together black beans, Mexican-style corn, diced tomatoes with green chile peppers, tomatoes and green onion stalks. Garnish with desired amount of cilantro leaves. Chill in the refrigerator at least 8 hours, or overnight, before serving.
Serve with tortilla chips

More tweaks - Ryan said he would add a bit of cumin and some chili powder to this...

Potatoes 101

by 👩‍🍳 Cooking With a Southern Vibe in Music City USA 👩‍🍳, February 19, 2007
Q: What is it about Yukon Golds that makes such wonderful mashed potatoes?

A: It has to do with the potato. There are hundreds of types of potatoes, but each falls into one of three types, classified by their starch content.

Starchy potatoes have high starch and low water. Starchy potatoes are great for baking and French fries, and good as mashed potatoes. When cooked in water, they disintegrate but when cooked by dry heat, they become crumbly and fluffy. Russet Burbanks are a popular type of starchy potato. Often russets are called Idahos or Washingtons (these are not varieties, only the farm location). Starchy potatoes can also be purple, like Purple Peruvians.

All-purpose or chef's potatoes have medium starch and medium water. All-purpose potatoes are great in stews, soups, mashed potatoes or for roasting. When cooked, they are at once moist and fluffy: they keep most of their shape in soups and don't dry out when baked. All-purpose potatoes are white, like White Roses, although they are also yellow (Yukon Golds), red (Red Golds), and blue (All Blue). Some all-purpose potatoes are called Maines, Long Islands, and Delawares (again, not variety names, but only the location of the farm). Fingerling potatoes are long, oval-shaped potatoes that have not grown to full size.

Waxy potatoes have low starch and high water. These potatoes stay firm in liquids and moist when roasted. They are good for stews, roasting and potato salads. Waxy potatoes can have red or tan skin, and white, red or yellow flesh. Different varieties include Irish Cobblers, Red Bliss, All Reds, Ruby Crescents and Butterfingers.

By the way, new potatoes can be any texture or type of potato, as long as the potatoes are harvested when the potato plant is still alive and the potatoes skin is still so thin that it can be rubbed off easily. Nearly all new potatoes behave as if they are waxy; that is, they have a low starch and high water content. New potatoes are good roasted, boiled and steamed. Creamers are potatoes that are no bigger than 1-inch in diameter.

- Food Network Kitchens

Haub House Bread Pudding with Whiskey Sauce

by 👩‍🍳 Cooking With a Southern Vibe in Music City USA 👩‍🍳, February 18, 2007

Haub House
Bread Pudding

4 cups milk
5 cups dry bread, broken
3 eggs
2 cups sugar
2 teaspoons vanilla
1 cup raisins
3 tablespoons butter

Soak bread in milk, then crush with hands until well-mixed. Add eggs, sugar, vanilla and raisins. Stir well.

Melt butter in a 13-by-9-inch glass baking dish. Pour mixture into the dish.

Bake at 375 degrees until very firm. Let cool, then cut into squares. Place on individual dishes when ready to serve.

Add sauce. Heat under broiler or in microwave.

Whiskey Sauce
5 tablespoons butter
◊ cup sugar
1 egg
2 ounces Yellowstone whiskey
Cream butter and sugar. Cook almost to a boil, then add beaten egg and cook for one minute. When cool, add whiskey.

Oven Baked Donuts from Heidi

by 👩‍🍳 Cooking With a Southern Vibe in Music City USA 👩‍🍳, February 16, 2007

Baked Doughnuts
February 12, 2007 | by Heidi

Mention the concept of a baked doughnut to any self-professed doughnut connoisseur, chances are you'll take some heat. The idea that a baked doughnut can match up to its deep-fried brethren is laughable in some circles. I'll concede they aren't the same, but baked doughnuts can be just as delicious - delicious yet different. They get bonus points for being healthier and for not making the house smell like a greasy fry station.

I spent the better part of Sunday trying to get the dough for these yeasted baked doughnuts right. Broadly speaking, if you can make pizza dough, you can make these. The process is very similar. I looked at a broad cross-section of recipes as inspiration and tried to settle on a ratio of sugar to egg to flour to yeast and salt that would yield a tender, slightly sweet, delicious, pillowy doughnut when baked.

Many recipes call for water as the base liquid, I opted for milk (I like the softness of the milk-based rolls I've made in the past) and I baked batches at 375, 400, and 425. On the higher end of the spectrum the bottoms browned too fast. I settled on 375 and a slightly longer time in the oven.

You can glaze these the way you would any other doughnut, but because I knew these were going to be at their pinnacle of taste minutes after coming out of the oven, I opted for a simple, classic, sugar dusting.

Baked Doughnuts

Don't over bake these, if anything, under bake them a bit - they will continue baking outside the oven for a few minutes. You want an interior that is moist and tender - not dry. Also, be sure to cut big enough holes in the center of your doughnuts - too small and they will bake entirely shut. Remember they rise, and they rise even more when they are baking. These really need to be made-to-order, but you can make and shape the dough the night before if you want to serve them for brunch. Instructions: after shaping, place doughnuts on baking sheet, cover and place in the refrigerator overnight. Pull them out an hour before baking, and let rise in a warm place before baking.

1 1/3 cups warm milk, 95 to 105 degrees (divided)
1 packet active dry yeast (2 1/4 teaspoons)
2 tablespoons butter
2/3 cup sugar
2 eggs
5 cups all-purpose flour (alternately, white whole wheat might work - haven't tried it yet)
A pinch or two of nutmeg, freshly grated
1 teaspoon fine grain sea salt

1/2 cup unsalted butter, melted
1 1/2 cups sugar
1 tablespoon cinnamon

Place 1/3 cup of the warm milk in the bowl of an electric mixer. Stir in the yeast and set aside for five minutes or so. Be sure your milk isn't too hot or it will kill the yeast. Stir the butter and sugar into the remaining cup of warm milk and add it to the yeast mixture. With a fork, stir in the eggs, flour, nutmeg, and salt - just until the flour is incorporated. With the dough hook attachment of your mixer beat the dough for a few minutes at medium speed. This is where you are going to need to make adjustments - if your dough is overly sticky, add flour a few tablespoons at a time. Too dry? Add more milk a bit at a time. You want the dough to pull away from the sides of the mixing bowl and eventually become supple and smooth. Turn it out onto a floured counter-top, knead a few times (the dough should be barely sticky), and shape into a ball.

Transfer the dough to a buttered (or oiled) bowl, cover, put in a warm place (I turn on the oven at this point and set the bowl on top), and let rise for an hour or until the dough has roughly doubled in size.

Punch down the dough and roll it out 1/2-inch thick on your floured countertop. Most people (like myself) don't have a doughnut cutter, instead I use a 2-3 inch cookie cutter to stamp out circles. Transfer the circles to a parchment-lined baking sheet and stamp out the smaller inner circles using a smaller cutter. If you cut the inner holes out any earlier, they become distorted when you attempt to move them. Cover with a clean cloth and let rise for another 45 minutes.

Bake in a 375 degree oven until the bottoms are just golden, 8 to 10 minutes - start checking around 8. While the doughnuts are baking, place the butter in a medium bowl. Place the sugar and cinnamon in a separate bowl.

Remove the doughnuts from the oven and let cool for just a minute or two. Dip each one in the melted butter and a quick toss in the sugar bowl. Eat immediately if not sooner.

Makes 1 1/2 - 2 dozen medium doughnuts.
© Jan CAN Cook · THEME BY WATDESIGNEXPRESS